12 KiB
BIOS
Vanilla BIOS Settings
At the minimum, these BIOS settings must be made to install and run macOS without any problems:
| Main Menu | Sub 1 | Sub 2 | Sub 3 |
|---|---|---|---|
| >> Security | >> Security Chip | Security Chip DISABLED |
|
| >> Fingerprint | Predesktop Authentication DISABLED |
||
| >> Secure Boot Configuration | Secure Boot DISABLED |
||
Press Clear All Secure Boot Keys |
|||
| >> Intel SGX | Intel SGX Control DISABLED |
||
| >> Config | >> Network | Wake on Lan DISABLED |
|
Wake on Lan from Dock DISABLED |
|||
UEFI IPv4 Network Stack DISABLED |
|||
UEFI IPv6 Network Stack DISABLED |
|||
| >> Startup | UEFI/Legacy Boot UEFI Only |
||
CSM Support No (per OpenCore Documentation) |
!!! tip You can also disable hardware/features you do not need to save power, some examples are:
| Main Menu | Sub 1 | Sub 2 | Sub 3 |
|---|---|---|---|
| >> Security | >> I/O Port Access | Wireless WAN DISABLED |
|
Fingerprint Reader DISABLED |
|||
Memory Card Slot DISABLED |
|||
| >> Config | >> USB | Always On USB DISABLED |
- If you DO NOT use Thunderbolt 3 hotplug in macOS (don't mind shutting down the machine to connect TB3 devices), this will drastically lower power consumption:
| Main Menu | Sub 1 | Sub 2 | Sub 3 |
|---|---|---|---|
| >> Config | >> Thunderbolt (TM) 3 | Thunderbolt BIOS Assist Mode Enabled |
|
Thunderbolt(TM) Device Enabled |
- If you DO use Thunderbolt 3 hotplug in macOS (at the expense of idle power consumption):
| Main Menu | Sub 1 | Sub 2 | Sub 3 |
|---|---|---|---|
| >> Config | >> Thunderbolt (TM) 3 | Thunderbolt BIOS Assist Mode Disabled |
|
Security Level No Security |
|||
Support in Pre Boot Environment: Thunderbolt(TM) Device Disabled |
Modding the BIOS
!!! danger As of of July 16th, 2021: the BIOS mod will break TPM. Hence, Windows 11 will not work. Consider this if you wish to proceed.
A modded BIOS will allow for more optimizations to be made for macOS and will overall make your hackintosh better. I am a BIOS modding novice myself, but with these instructions, I was able to mod my x1c6 BIOS in less than one hour. I fully recommend doing this for all who think themselves capable. Furthermore, the default config.plist for this repository is meant to accommodate a modded BIOS with appropriate settings. If you cannot mod your BIOS or is unwilling to do so, use config_unmoddedBIOS.plist.
 [SPI Programmer CH341a and SOIC8 connector](https://www.amazon.com/Organizer-Socket-Adpter-Programmer-CH341A/dp/B07R5LPTYM) are needed.
Here are the steps to mod your BIOS (credits to paranoidbashthot and \x). Attempt this at your own risk.
- Refer to digmorepaka/thinkpad-firnware-patches.
- Use
xx_80_patches-v*.txt, I commented out WWAN patches since I do not need it. - @notthebee also has a useful video to follow: https://www.youtube.com/watch?v=ce7kqUEccUM
- Remember to dump the vanilla twice and use
diffto make sure things were dumped properly, store this backup somewhere safe. - Confirmed working
BIOS-v1.45, I cannot be sure about other BIOS versions. Though they will most likely work as well. - The modded BIOS does not need to be signed by
thinkpad-eufi-sign. Just remember to replace 4C 4E 56 42 42 53 45 43 FB with 4C 4E 56 42 42 53 45 43 FF on the patched BIOS.- The BIOS chip is located above the CPU, under the sticker shield:
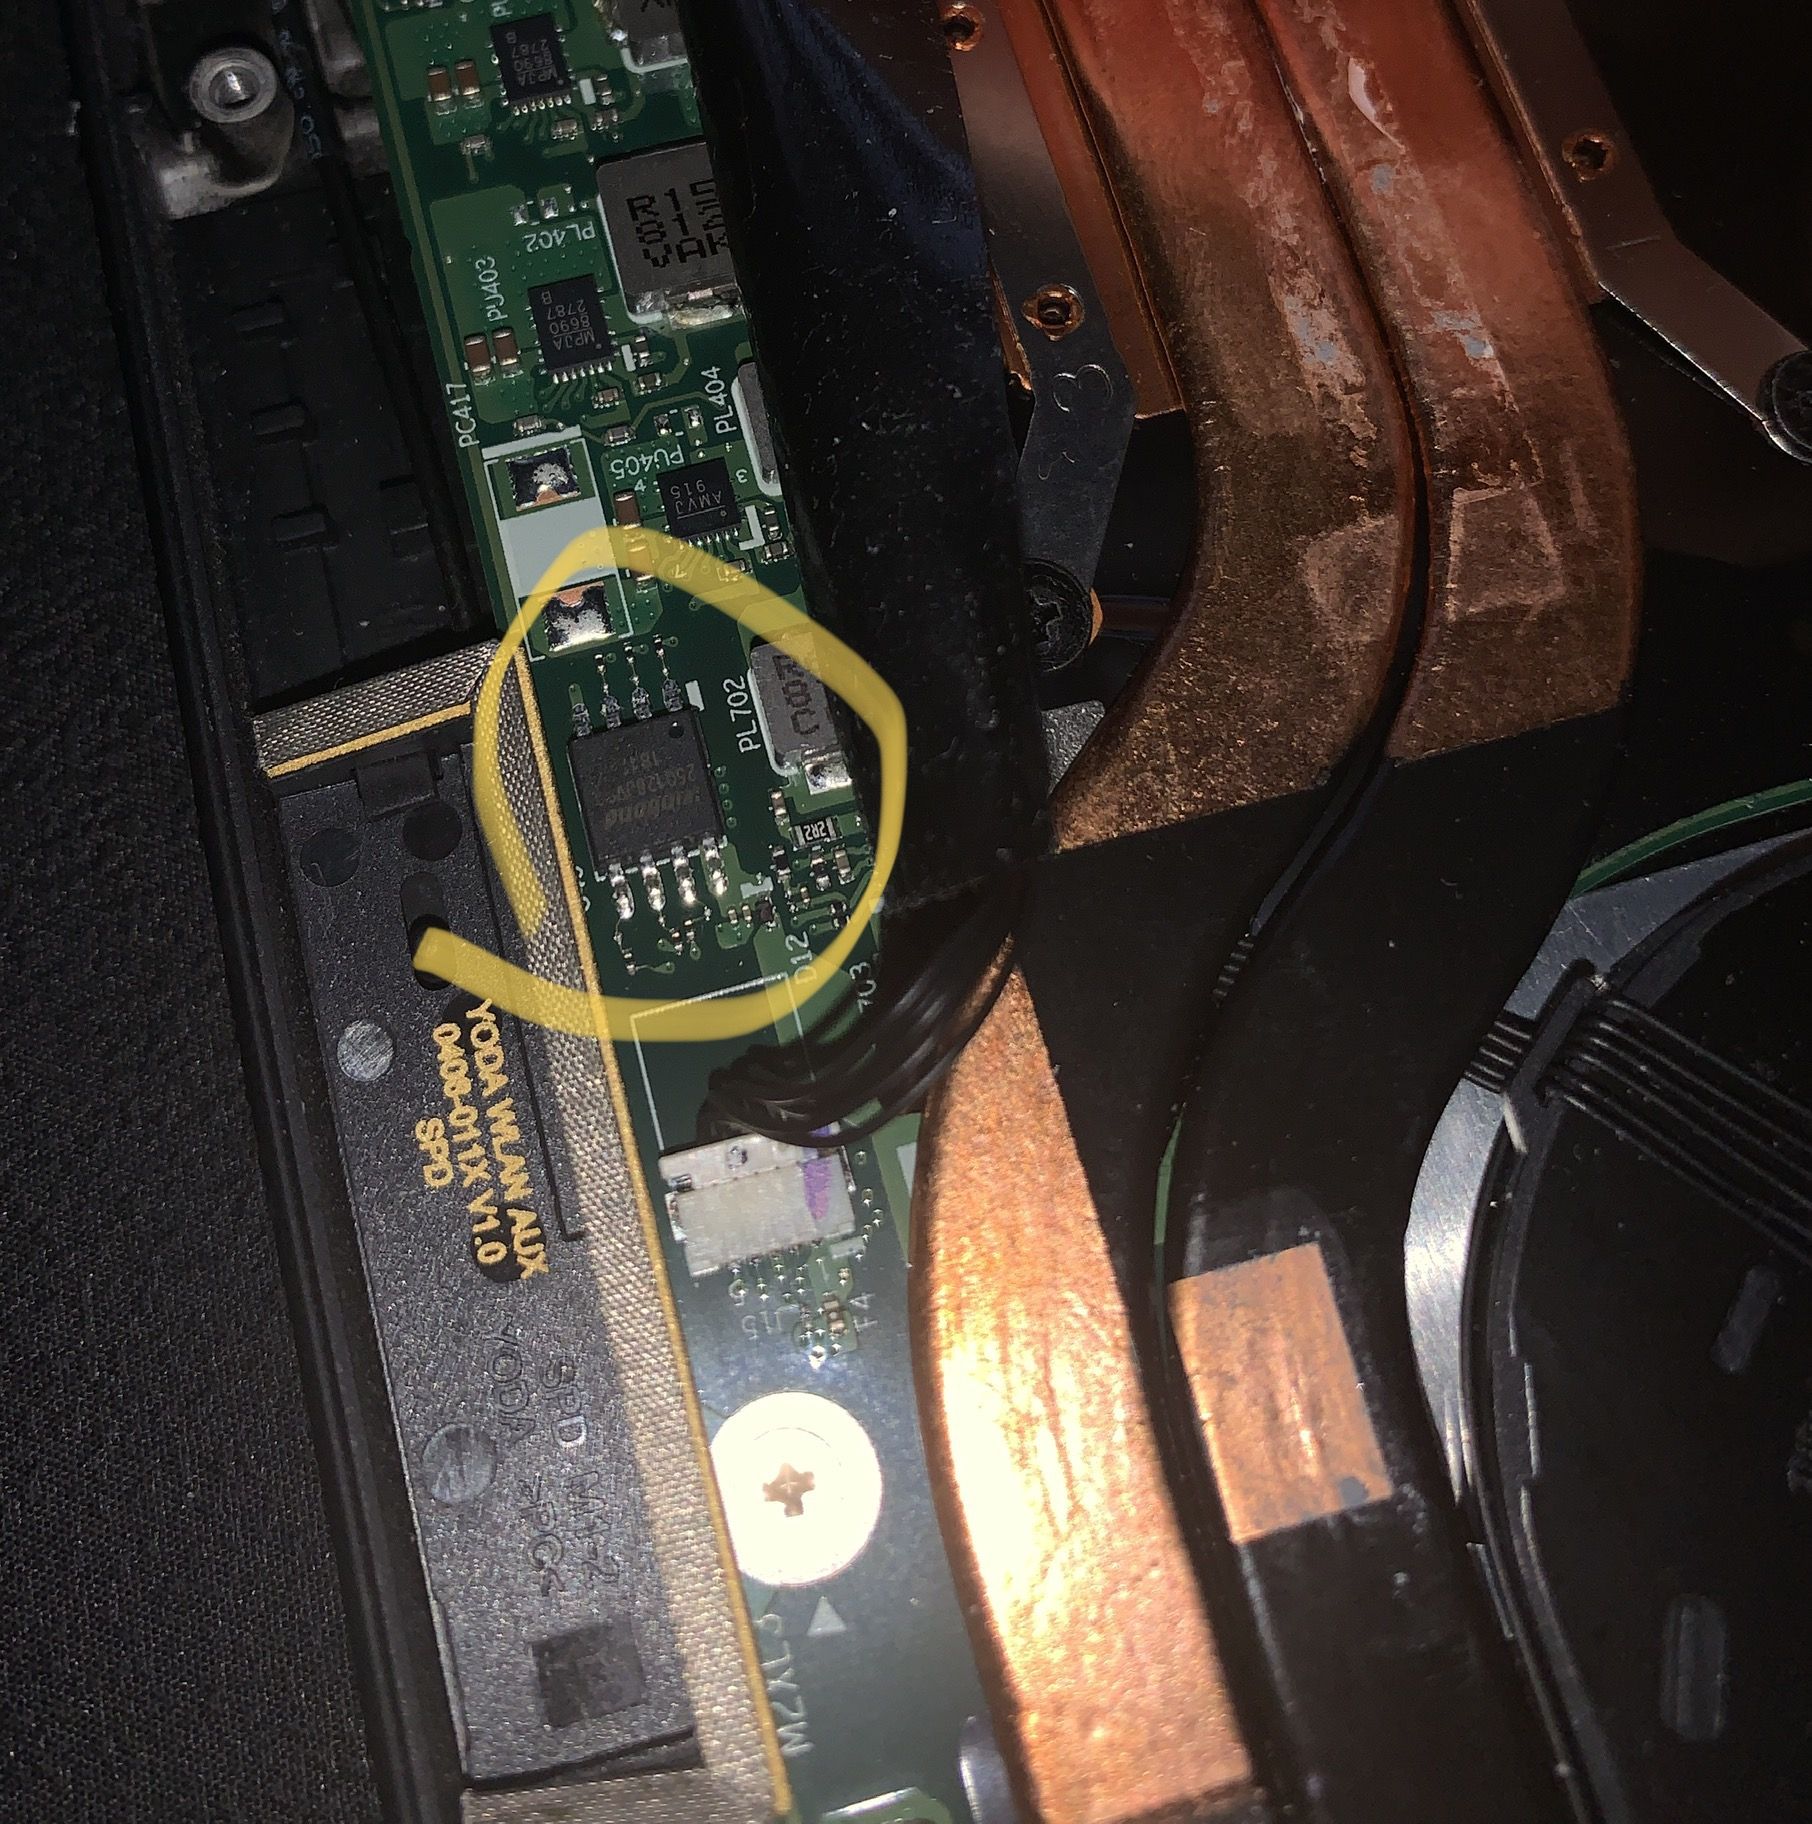
- Your BIOS chip may not be made by Winbond, but by Macronix instead. In that case, add the argument
-c MX25L12835F/MX25L12845E/MX25L12865Etoflashrom. See Issue #116- Successfully modding your BIOS will reveal the
Advance Menutab.
- Successfully modding your BIOS will reveal the

- It goes without saying, after doing this, do not update your BIOS unless you want to do this again.
Modded BIOS Settings
The following are further optimization settings that can be figured once your BIOS is modded.
- These settings are universally recommended optimizations for your hackintosh:
| Main Menu | Sub 1 | Sub 2 | Sub 3 | Sub 4 |
|---|---|---|---|---|
| Advanced Tab | >> Intel Advanced Menu | >> System Agent (SA) Configuration | >> Graphics Configuration | DVMT Pre-Allocated 64M |
| >> Power & Performance | >> CPU - Power Management Control | >> CPU Lock Configuration (Last item, scroll up/down until you see it) CFG Lock Disabled |
- I also recommend undervolting your machine regarless of your usage, the following are stable settings for my x1c6 with
i7-8650U, verified by stress testing withPrime95andHeaven Benchmark, your may be worse or better, please do your own testing. In addition, I suggest you repaste your machine with an aftermarket thermal paste for lower temps and a better undervolt.
| Main Menu | Sub 1 | Sub 2 | Sub 3 | Sub 4 |
|---|---|---|---|---|
| Advanced Tab | >> Intel Advanced Menu | >> OverClocking Performance Menu | OverClocking Feature Enabled |
|
| >> Processor | Voltage Offset 100 |
|||
Offset Prefix - |
||||
| >> GT | GT Voltage Offset 80 |
|||
Offset Prefix - |
||||
GTU Voltage Offset 80 |
||||
Offset Prefix - |
||||
| >> Uncore | Uncore Voltage Offset 80 |
|||
Offset Prefix - |
||||
-
The following settings depend on your own personal preference:
-
If you want to optimize CPU performance at the cost of battery:
| Main Menu | Sub 1 | Sub 2 | Sub 3 | Sub 4 |
|---|---|---|---|---|
| Advanced Tab | >> Power & Performance | >> CPU - Power Management Control | Boot performance mode Turbo Performance |
|
| >> Config TDP Configurations | Up |
|||
- If you want to optimize battery time at the cost of performance:
| Main Menu | Sub 1 | Sub 2 | Sub 3 | Sub 4 |
|---|---|---|---|---|
| Advanced Tab | >> Power & Performance | >> CPU - Power Management Control | Boot performance mode Max Battery |
|
| >> Config TDP Configurations | Down |
|||