BIOS
At the minimum, these BIOS settings must be made to install and run macOS without any problems:
| Main Menu |
Sub 1 |
Sub 2 |
Sub 3 |
|
>> Security |
>> Security Chip |
Security Chip DISABLED |
|
|
>> Fingerprint |
Predesktop Authentication DISABLED |
|
|
>> Secure Boot Configuration |
Secure Boot DISABLED |
|
|
|
Press Clear All Secure Boot Keys |
|
|
>> Intel SGX |
Intel SGX Control DISABLED |
|
>> Config |
>> Network |
Wake on Lan DISABLED |
|
|
|
Wake on Lan from Dock DISABLED |
|
|
|
UEFI IPv4 Network Stack DISABLED |
|
|
|
UEFI IPv6 Network Stack DISABLED |
|
>> Startup |
UEFI/Legacy Boot UEFI Only |
|
|
|
CSM Support No (per OpenCore Documentation) |
|
- You should also disable hardware devices you do not need to save power, some examples are:
| Main Menu |
Sub 1 |
Sub 2 |
Sub 3 |
|
>> Security |
>> I/O Port Access |
Wireless WAN DISABLED |
|
|
|
Fingerprint Reader DISABLED |
|
|
|
Memory Card Slot DISABLED |
|
>> Config |
>> USB |
Always On USB DISABLED |
- If you do not use Thunderbolt 3 hotplug in macOS (don't mind shutting down the machine to connect TB3 devices), this will drastically lower power consumption:
| Main Menu |
Sub 1 |
Sub 2 |
Sub 3 |
|
>> Config |
>> Thunderbolt (TM) 3 |
Thunderbolt BIOS Assist Mode Enabled |
|
|
|
Thunderbolt(TM) Device Enabled |
- If you do do want to use Thunderbolt 3 hotplug in macOS (at the expense of idle power consumption):
- NOTE: If you do have a modded BIOS firmware, please reset all settings relating to Thunderbolt 3 to default, all that's needed are settings detailed below or in 1_README-HARDWAREandBIOS.md
| Main Menu |
Sub 1 |
Sub 2 |
Sub 3 |
|
>> Config |
>> Thunderbolt (TM) 3 |
Thunderbolt BIOS Assist Mode Disabled |
|
|
|
Security Level No Security |
|
|
|
Support in Pre Boot Environment: Thunderbolt(TM) Device Disabled |
Modding the BIOS
!!! danger
As of of July 16th, 2021: the BIOS mod will break TPM. Hence, Windows 11 will not work. Consider this if you wish to proceed.
A modded BIOS will allow for more optimizations to be made for macOS and will overall make your hackintosh better. I am a BIOS modding novice myself, but with these instructions, I was able to mod my x1c6 BIOS in less than one hour. I fully recommend doing this for all who think themselves capable. Furthermore, the default config.plist for this repository is meant to accommodate a modded BIOS with appropriate settings. If you cannot mod your BIOS or is unwilling to do so, use config_unmoddedBIOS.plist.

[SPI Programmer CH341a and SOIC8 connector](
https://www.amazon.com/Organizer-Socket-Adpter-Programmer-CH341A/dp/B07R5LPTYM) are needed.
Here are the steps to mod your BIOS (credits to paranoidbashthot and \x):
- Refer to http://paranoid.anal-slavery.com/biosmods/skylake.html
- Use
xx_80_patches-v*.txt, I commented out WWAN patches since I do not need it.
- @notthebee also has a useful video to follow: https://www.youtube.com/watch?v=ce7kqUEccUM
- Remember to dump the vanilla twice and use
diff to make sure things were dumped properly, store this backup somewhere safe.
- Confirmed working
BIOS-v1.45, I cannot be sure about other BIOS versions. Though they will most likely work as well.
- The modded BIOS does not need to be signed by
thinkpad-eufi-sign. Just remember to replace 4C 4E 56 42 42 53 45 43 FB with 4C 4E 56 42 42 53 45 43 FF on the patched BIOS.
- The BIOS chip is located above the CPU, under the sticker shield:
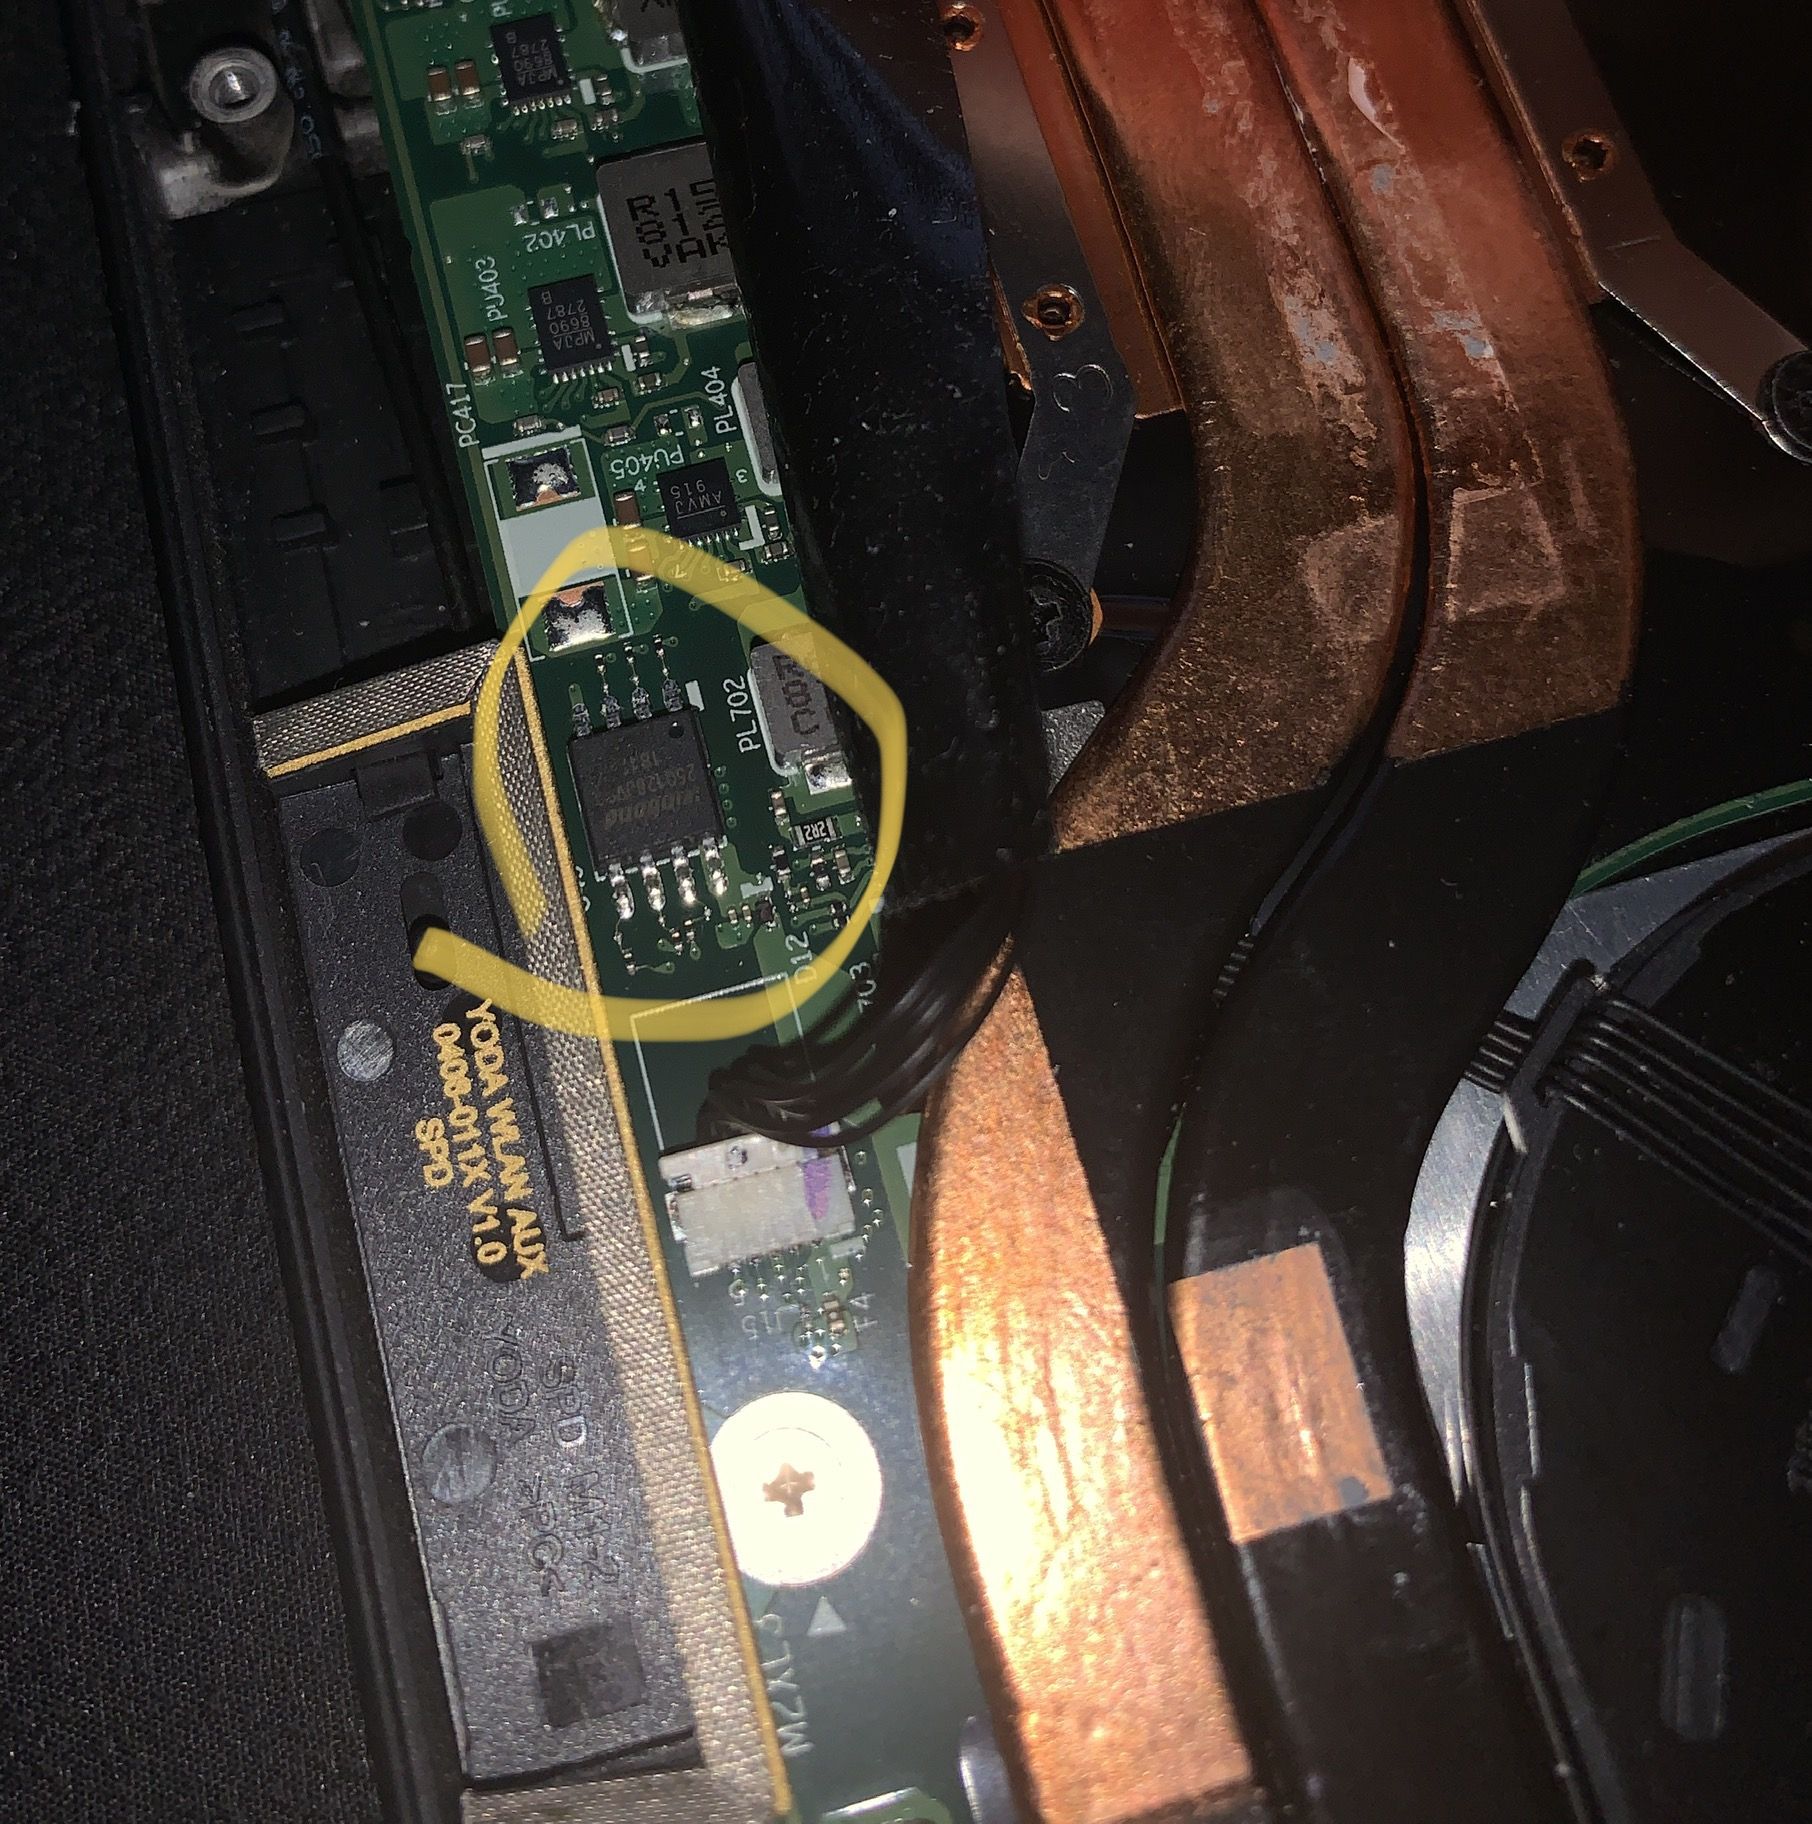
- Your BIOS chip may not be made by Winbond, but by Macronix instead. In that case, add the argument
-c MX25L12835F/MX25L12845E/MX25L12865E to flashrom. See Issue #116
- Successfully modding your BIOS will reveal the
Advance Menu tab:

- It goes without saying, after doing this, do not update your BIOS unless you want to do this again.
Finally, make sure to backup your pre-modded BIOS twice and compare the two to make sure that it was dumped properly. Furthermore, attempt this at your own risk, I am not responsible for any damages you may cause.
Modded BIOS Settings
The following are further optimization settings that can be figured once your BIOS is modded.
- These settings are universally recommended optimizations for your hackintosh:
| Main Menu |
Sub 1 |
Sub 2 |
Sub 3 |
Sub 4 |
| Advanced Tab |
>> Intel Advanced Menu |
>> System Agent (SA) Configuration |
>> Graphics Configuration |
DVMT Pre-Allocated 64M |
|
|
>> Power & Performance |
>> CPU - Power Management Control |
>> CPU Lock Configuration (Last item, scroll up/down until you see it) CFG Lock Disabled |
- I also recommend undervolting your machine regarless of your usage, the following are stable settings for my x1c6 with
i7-8650U, verified by stress testing with Prime95 and Heaven Benchmark, your may be worse or better, please do your own testing. In addition, I suggest you repaste your machine with an aftermarket thermal paste for lower temps and a better undervolt.
| Main Menu |
Sub 1 |
Sub 2 |
Sub 3 |
Sub 4 |
| Advanced Tab |
>> Intel Advanced Menu |
>> OverClocking Performance Menu |
OverClocking Feature Enabled |
|
|
|
|
>> Processor |
Voltage Offset 100 |
|
|
|
|
Offset Prefix - |
|
|
|
>> GT |
GT Voltage Offset 80 |
|
|
|
|
Offset Prefix - |
|
|
|
|
GTU Voltage Offset 80 |
|
|
|
|
Offset Prefix - |
|
|
|
>> Uncore |
Uncore Voltage Offset 80 |
|
|
|
|
Offset Prefix - |
|
|
|
|
|
- The following settings depend on your own personal preference:
- If you want to optimize CPU performance at the cost of battery:
| Main Menu |
Sub 1 |
Sub 2 |
Sub 3 |
Sub 4 |
| Advanced Tab |
>> Power & Performance |
>> CPU - Power Management Control |
Boot performance mode Turbo Performance |
|
|
|
|
>> Config TDP Configurations |
Up |
|
|
|
|
|
- If you want to optimize battery time at the cost of performance:
| Main Menu |
Sub 1 |
Sub 2 |
Sub 3 |
Sub 4 |
| Advanced Tab |
>> Power & Performance |
>> CPU - Power Management Control |
Boot performance mode Max Battery |
|
|
|
|
>> Config TDP Configurations |
Down |
|
|
|
|
|