7.1 KiB
| icon |
|---|
| material/chip |
BIOS Settings
Modding the machine's BIOS is optional and will unlock hidden advanced settings. These settings allow for better optimizations under macOS.
/// danger The BIOS mod will permanently break TPM.
Only mod the BIOS if you do not need TPM under Windows or Linux. ///
:material-fast-forward-outline: Skip to Vanilla BIOS Settings{ .md-button }
BIOS Modding
 { align=right width=200 }
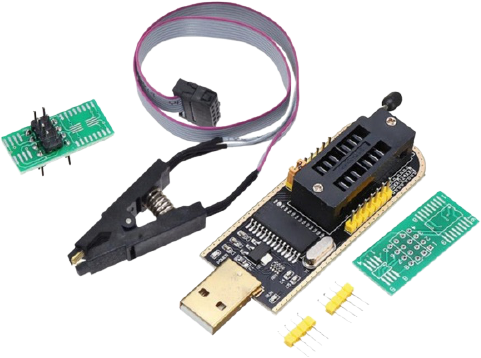
The CH341a SPI Programmer and SOIC8 Clip are needed to dump and flash the BIOS chip. An inexpensive one from Amazon/eBay is sufficient.
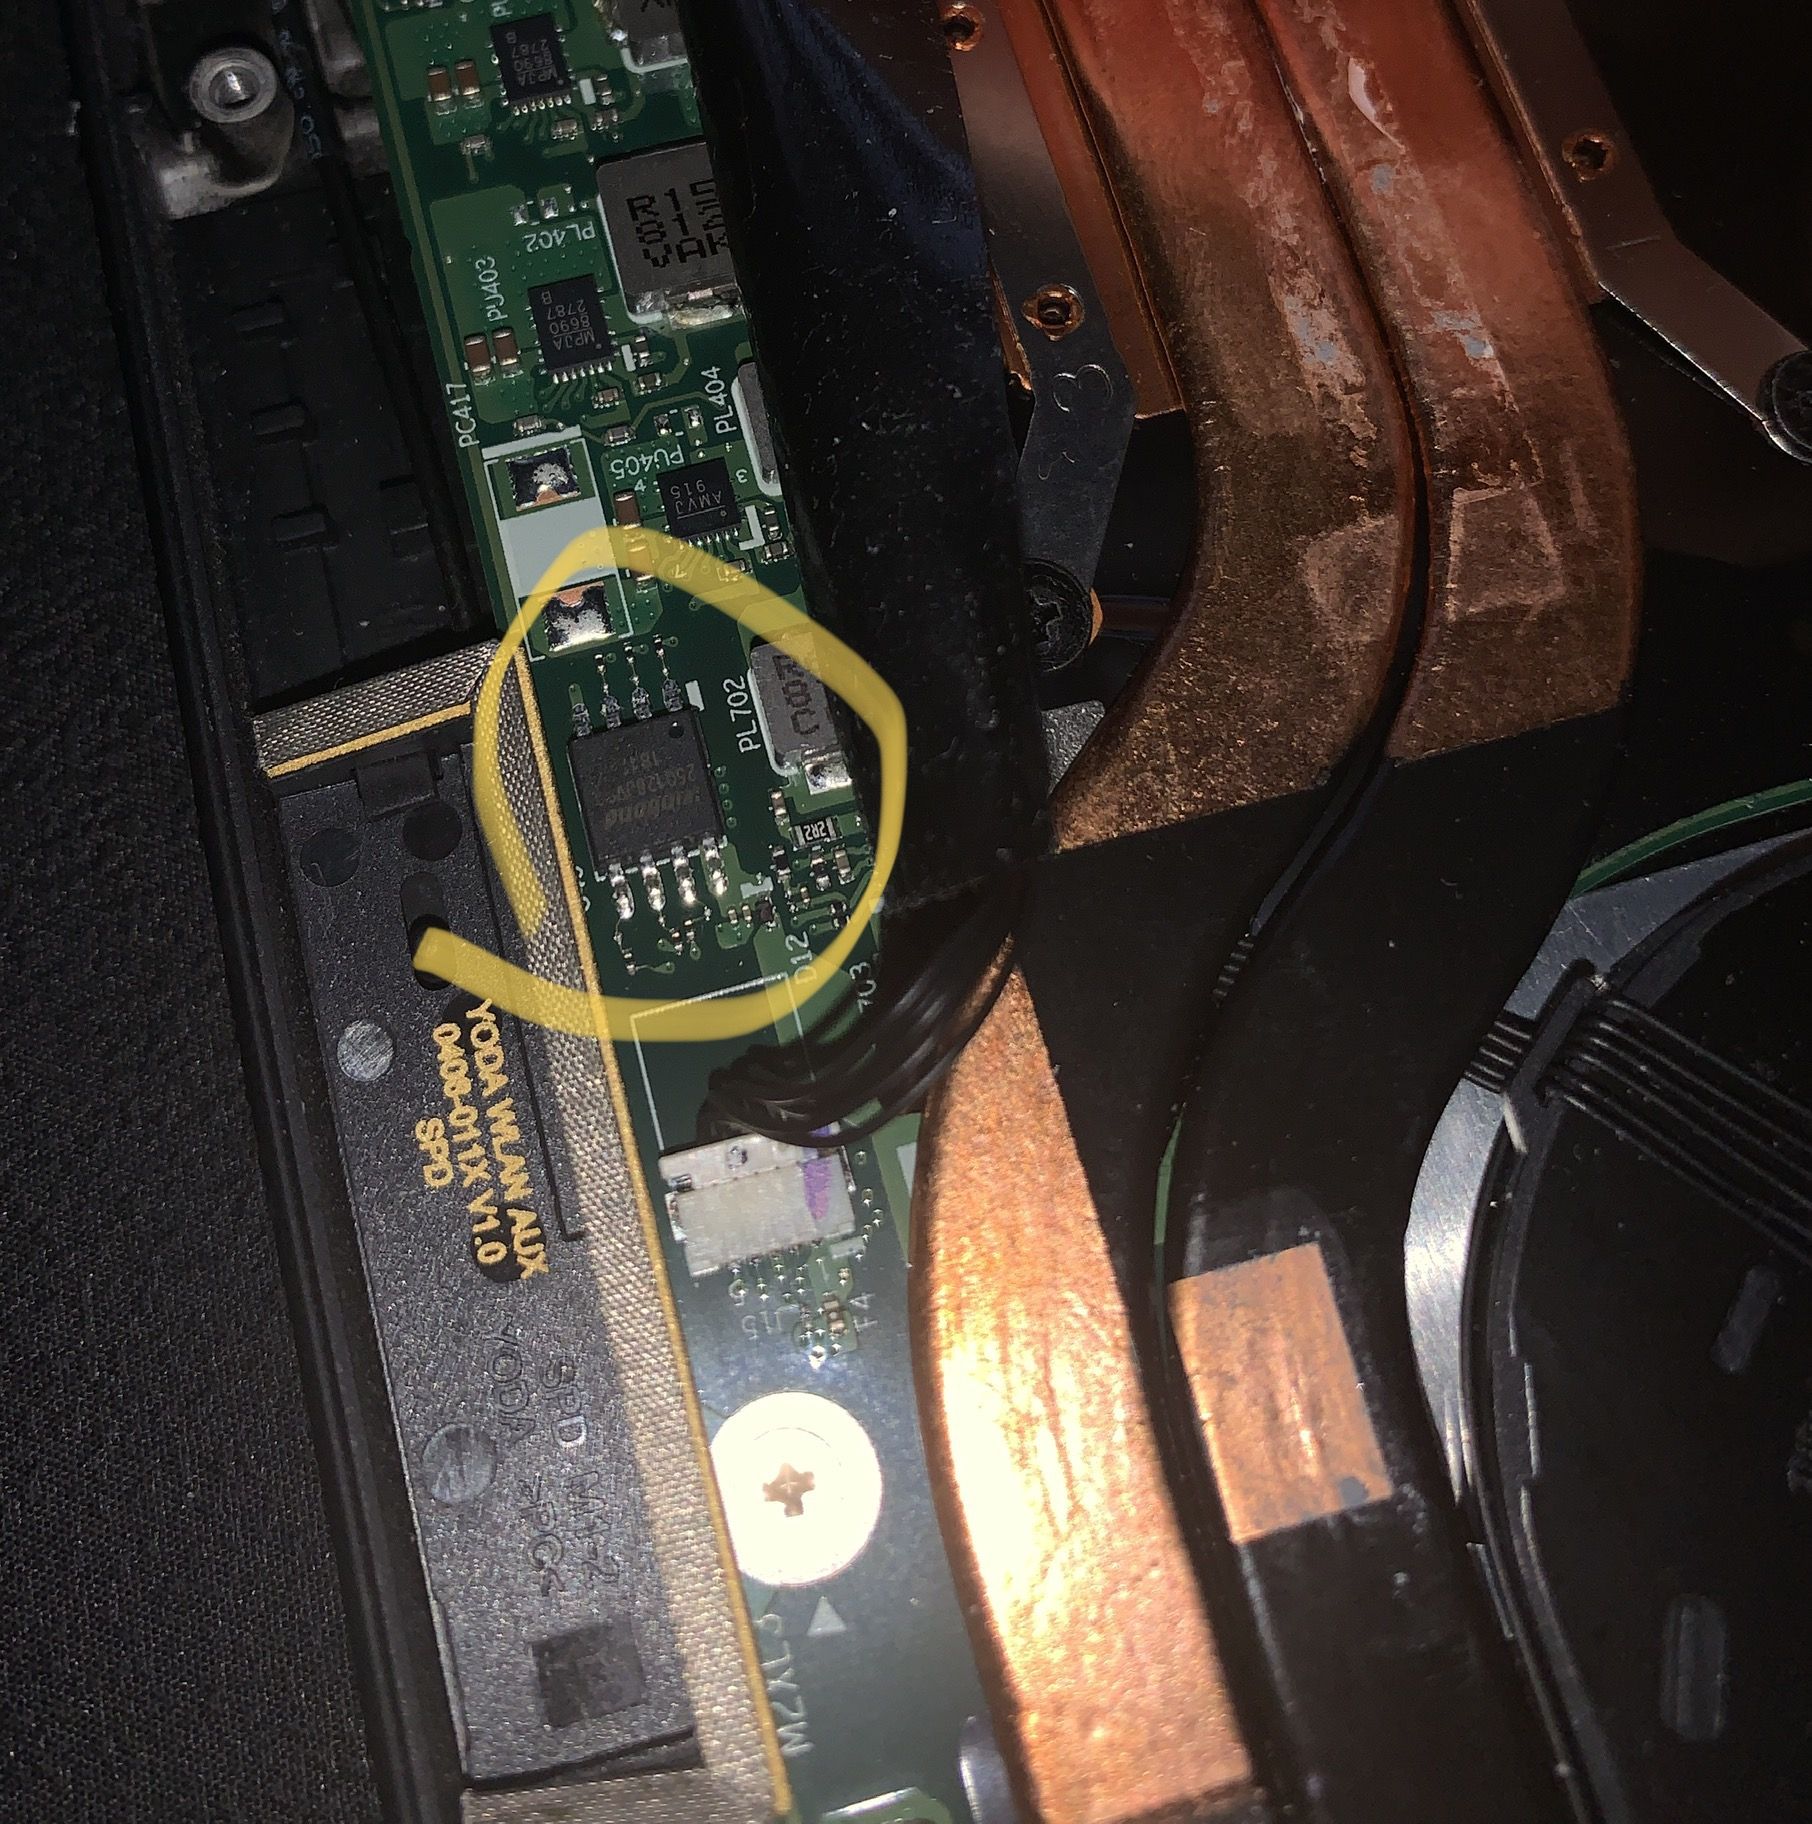
The BIOS chip is located just above the CPU, hidden under the sticker shield.
- :octicons-git-branch-16:{ .foreground } digmorepaka/thinkpad-firmware-patches
{ .twemoji }
{ .twemoji }
{ .twemoji }
{ .twemoji }
/// announce | Credits
Thank you to paranoidbashthot and \x for creating the patches.
///
:simple-youtube:{ .youtube } @notthebee similarly modded his BIOS in :simple-youtube:{ .youtube } Removing Wi-Fi Whitelist ... & Unlocking Advanced BIOS Settings
-
Use
xx_80_patches-v*.txt, feel free to comment out the WWAN patches if unnecessary. -
Remember to dump the vanilla twice and use
diffto make sure things were dumped properly, store this backup somewhere safe. -
Confirmed working
BIOS-v1.45, I cannot be sure about other BIOS versions. Though they will most likely work as well. -
The modded BIOS does not need to be signed by
thinkpad-eufi-sign. Remember to replace4C 4E 56 42 42 53 45 43 FBwith4C 4E 56 42 42 53 45 43 FFon the patched BIOS. -
Your BIOS chip may not be made by Winbond, but by Macronix instead. In that case, add the argument
-c MX25L12835F/MX25L12845E/MX25L12865Etoflashrom. See Issue #116``
/// success
Successfully modding your BIOS will reveal the Advance Menu tab.

It is safe to update the BIOS. However, the patches will have to be reapplied and reflashed. ///
Modded BIOS Settings
DVMT Pre-Allocated will enable 4K HDMI output. Disabling CFG Lock gives Kernel (XNU) and AppleIntelPowerManagement the ability to write to the MSR 0xE2 register.
graph LR
    id1[Advance Tab]-->id2[Intel Advanced Menu];
    id2-->id3[System Agent Configuration];
    id2-->id4[Power & Performance];
    id3-->id5[Graphics Configuration];
    id4-->id6[CPU - Power Management Control];
    id5-->|DVMT Pre-Allocated|64M;
    id6-->id7[CPU Lock Configuration];
    id7-->|CFG Lock|Disabled;
Optimization Settings
/// tip | Undervolting
I also recommend undervolting your machine. Be sure to verify your resulting by stress testing with Prime95 and Heaven Benchmark.
The following are stable settings for my x1c6 with i7-8650U, repasted with Thermal Grizzly.
///
graph LR
    id1[Advance Tab]-->id2[Intel Advanced Menu];
    id2-->id3[OverClocking Performance Menu];
    id3-->|OverClocking Feature|Enabled;
    id3-->Processor;
    id3-->GT;
    id3-->Uncore;
    Processor-.->|Voltage Offset|100;
    Processor-.->|Offset Prefix|id4[-];
    GT-.->|GT Voltage Offset|id8[80];
    GT-.->|Offset Prefix|id5[-];
    GT-.->|GTU Voltage Offset|id8;
    GT-.->|Offset Prefix|id5;
    Uncore-.->|Uncore Voltage Offset|80;
    Uncore-.->|Offset Prefix|id6[-];
/// setting | Optimize CPU performance at the cost of battery ///
graph LR
    id1[Advance Tab]-->id2[Power & Performance];
    id2-->id3[CPU - Power Management Control];
    id3-->|Boot Performance Mode|id4[Turbo Performance];
    id3-->|Config TDP Configurations|Up;
/// setting | Optimize battery time at the cost of performance ///
graph LR
    id1[Advance Tab]-->id2[Power & Performance];
    id2-->id3[CPU - Power Management Control];
    id3-->|Boot Performance Mode|id4[Max Battery];
    id3-->|Config TDP Configurations|Down;
Vanilla BIOS Settings
These BIOS settings must be made to install and run macOS without any problems:
graph LR
    id1[Main Menu]-->Security;
    id1-->Config;
    id1-->Startup;
    Security-->TPM[Security Chip];
    Security-->Fingerprint;
    Security-->SBC[Secure Boot Configuration];
    Config-->Network;
    Startup-.->|UEFI/Legacy Boot|id4[UEFI Only];
    Startup-.->|CSM Support|No;
    TPM-.->|Security Chip|id2[Disabled];
    Fingerprint-.->|Predesktop Authentication|id2;
    SBC-.->|Secure Boot|id2;
    Network-.->|Wake on LAN|id3[Disabled];
    Network-.->|Wake on LAN from Dock|id3;
    Network-.->|UEFI IPv4 Network Stack|id3;
    Network-.->|UEFI IPv6 Network Stack|id3;
/// tip You can also disable hardware/features you do not need to save power, some examples are: ///
graph LR
    id1[Main Menu]-->Security;
    id1-->Config;
    Security-->id2[I/O Port Access];
    Config-->USB;
    id2-->|Wireless WAN|id3[Disabled];
    id2-->|Fingerprint Reader|id3;
    id2-->|Memory Card Slot|id3;
    USB-->|Always on USB|Disabled;
Thunderbolt 3 Settings
/// setting | Thunderbolt 3 Coldplug If you DO NOT use Thunderbolt 3 hotplug in macOS (don't mind shutting down the machine to connect TB3 devices), this will drastically lower power consumption: ///
graph LR
    id1[Main Menu]-->Config;
    Config-->id2[Thunderbolt 3];
    id2-.->|Thunderbolt BIOS Assist Mode|Enabled;
    id2-.->|Thunderbolt Device|Enabled;
/// setting | Thunderbolt 3 Hotplug If you DO use Thunderbolt 3 hotplug in macOS (at the expense of idle power consumption): ///
graph LR
    id1[Main Menu]-->Config;
    Config-->id2[Thunderbolt 3];
    id2-.->|Thunderbolt BIOS Assist Mode|Disabled;
    id2-.->|Security Level|id3[No Security];
    id2-.->|Support in Pre Boot Environment: Thunderbolt Device|Disabled;